Sunday, 28 October 2018

All in One Sponge Cake 


This cake is my go to cake for almost all situations when I just want a quick sponge cake, you can obviously make it in the traditional Victora Sponge cake way by using and beating the butter and sugar first however I find that a cake made using Bertolli is amazing. It gives you a delicious soft sponge, the key is though always se the best eggs you can. Free range will always give you a richer flavour, I always use Clarence Court eggs but obviously if you have free range eggs yourself then perfect. The quantities here should be enough for a three layer 8 inch/20cm sponge cake so if you want to make a larger cake then adapt accordingly. I go by the rule of a 4oz/115g  mix for each tin, which means  4 oz/115g flour, 4 oz/115g sugar, 4oz/115g bertolli, 2 eggs


Ingredients


340g/12oz gluten free self raising flour (I use doves farm)
340g/ 12oz caster sugar
340g/ 12oz bertolli margarine or other soft margarine 
6 eggs, beaten

Method

1. Grease and line your tins with baking parchment
2. Preheat oven to 180c/gas mark 4
3. For the all in one method weigh out all the ingredients and place in a bowl and then either use a free standing mixer with the paddle blade attached, a food processor or a hand held electric mixer. If you don't have any of those then use a wooden spoon and I would then use the method for a traditional victoria sponge cake which is to beat the margarine with the sugar until pale in colour, light and fluffy and then add the beaten eggs gradually alternating with a spoon of flour after each addition of egg to prevent curdling, then add in the remainder of the flour.
4. Divide the mix equally between the tins.
5. Bake for 20-25 mins until it is golden and a knife or skewer comes out clean when inserted.
6. Leave to cool for five minutes in the tin then turn out onto a wire rack to cool.
7. Once cool you can then sandwich the sponges together with the filling of your choice, I have put some suggestions below, decorate the top and sides if required or just sprinkle with icing sugar. 
8. You can also freeze the sponges by wrapping them individually and stacking them, it is really important to wrap them individually  otherwise you won't be able to get them apart very easily, I do this  by layering baking parchment in between each sponge, and then stacking in a freezer container or wrapping in cling film or foil, when you want to use them just defrost on a wire rack before placing on a plate or board to avoid sweating. If I am making a Birthday cake I buttercream when still frozen as it makes it so much easier and then leave it on a wire rack to fully defrost before covering any fondant if using.


Filling suggestions


Buttercream- See below
Double Cream and fruit 
Clotted cream and jam
Cream and lemon curd

Buttercream

200g softened,butter
400g icing sugar
2 tblsp water/milk
few drops food colouring if desired

Variations

Coffee- add 1 1/2tbsp coffee granules mixed with 2 tblsp boiling water instead of the water in buttercream recipe, allow to cool before adding or 2tblsp espresso coffee instead of 2 tblsp water just allow to cool before adding.
Lemon- Finely grated rind of a lemon and 2 tblsp lemon juice instead of water in buttercream recipe., or a good dollop of lemon curd.
Chocolate- 3 tblsp cocoa powder mixed in with the icing sugar, melt 80g plain chocolate, allow to cool and then stir into the buttercream once the butter, cocoa, icing sugar is beaten. If too stiff slowly add up to 1 1/2 tblsp milk, you want it to be thick so you may not need all of it.


Method
1. Put the softened  butter and icing sugar in a bowl and beat by hand, with an electric mixer or beat with a free standing mixer. 
2, If using a free standing mixer I drape a tea towel over the top of the mixer before switching on to avoid plumes of sugar  dust flying everywhere.
3. Mix the butter and sugar until well blended adding the water, or whatever liquid or flavouring you are using. 
4. Keep beating until really soft and then spread or pipe inside and onto the cake.  


Saturday, 28 July 2018

Buttermilk slow cooker cake


Ingredients


200g self raising flour
200ml buttermilk
125g caster sugar
2 eggs
100g butter or margarine, I like to use Bertolli

Optional topping -Clotted cream and berries

Method

1. First make sure you have a deep cake tin that fits inside your slow cooker. Scrunch up a bit of cooking foil and place at the bottom of the slow cooker


2. Grease and line the base of your cake tin with baking parchment.
3. Beat the Bertolli and caster sugar together until light and fluffy either in a free standing mixer with a paddle attachment .
4. Add the eggs one at a time adding a large spoonful of flour after each addition and beating really well, add more flour if to starts to curdle.
5. Beat in the remaining flour and then the Buttermilk.
6. Pour into the lined tin.
7. Pop the tin inside the slow cooker. Place on the lid and then cook on high until cooked.
8. Sorry this bit is a bit vague but it all depends on your slow cooker. Mine only took an hour. It will not be at all brown on the top so it is hard to tell if its cooked but if you insert a knife into the middle and it comes out clean it is cooked.
9. You may need to wipe the lid with kitchen paper towards the end to absorb condensation.
10. Once cooked turn out onto a wire rack and allow to cool and then cover with clotted cream, cream, fruit or just a dusting of icing sugar. 

Tuesday, 29 May 2018


Shortbread


Ingredients

175g softened butter
75g caster sugar
175 g rice flour
75g cornflour
1/4 tsp xanthum gum


Method

1. Preheat the oven to 150c 
2. Line several baking sheets with baking parchment.
3. In a free standing mixer with a paddle blade , food processor or with a wooden spoon, beat the butter and sugar together until well blended and light and creamy.
4. Next add in the cornflour, rice flour and xanthum gum, mix until combined and forms a dough.
5. Roll out the mix on a surface dusted with rice flour, cut out into desired shapes, I cut mine quite small as they are very light so hold their shape better that way. I either use a 3 cm in diameter round cutter or I cut them into 2cm small squares.


6. I place the on the baking sheets to all for spreading and then chill int the fridge for 10 minutes.
7.Once it has been chilled then I bake for about 30 minutes if you have a fan oven otherwise it may take up to 40 minutes. They are done when they are golden and leave then in situ until they are cool.


Variations

Lemon- Add grated rind of 1- 2 lemons depending on how large they are and how lemony you like it.
Chocolate- Add 125 g chopped plain chocolate 
Chocolate and orange- Add grated rind of one orange and 125g plain chocolate
Lavender- Add a sprinkling of either fresh or dried lavender flowers off the stalk (about a teaspoon but depends on how strong you want it)
Edible flowers- roll into the dough any edible flowers you like, I like to use violas, cornflower petals (I always pull the petals off the cornflowers), lavender or dried or fresh rose petals but use whatever you desire just be sure the flowers are edible ones and are free of pesticides and make sure you only use the edible parts, some flowers may have edible petals but the stamens or other parts may not be so always make sure you check first. Roll the petals in and cut out and bake as per above, the flowers will fade but it gives the shortbread an almost vintage look!


Brown sugar chocolate shortbread

1. Make up the dough as above adding 125g chopped plain chocolate,
2. Once the dough is made roll into along cylindrical shape about 3cm in diameter and wrap in greaseproof paper, it may be better to do two cylindrical shapes.
3. Chill for about 15 mins and then when it is suitably firm, remove the greaseproof paper and brush with beaten egg.
4. Roll the dough cylinder in demerara sugar, you may have to sprinkle on also to get it covered. 
5.Very carefully slice the dough into discs about 1cm thick, you may hit chocolate chunks as you go and the dough may break but don't worry just squidge it together into a disc again.
6. Place on the baking sheet and bake in exactly the same way as above. 


Lemon curd and summer fruit meringue roulade


This dessert really is so quick and simple, the hardest part is deciding what plate to serve it on!......You can of course leave out the lemon curd if you do not like lemon and equally you can swap in whatever fruit you choose, I do tend to change the fruit depending on what I have and even use frozen summer fruits on occasion. 
For extra pointers on meringue see my pavlova post back in September


Ingredients

4 egg whites
250g caster sugar
1 tsp cornflour

Filling

300ml double cream, whisked to soft peaks 
300g soft summer fruits, I use raspberries, blackberries and red and blackcurrants, You can also use frozen summer fruits or a mix of fresh and frozen.
2 tblsp lemon curd

Method

1. Line a 23cm  x 33cm swiss roll tin, with baking parchment. 
2. Preheat the oven to 200c 
3. Whisk your egg whites in either a free standing mixer with a balloon whisk attached or with a hand held whisk.  
4. Whisk them until they are stiff enough to turn the bowl upside down over your head without the mix sliding out. 
5. Add in your caster sugar one tablespoon at a time and continue until its all mixed in. 
6. Whisk in the cornflour.
7. Spoon the mixture into the lined tin and level the mixture out spreading to the edge.
8. Bake in the oven for about 8 minutes or until the top is golden brown.
9. Reduce the temperature to 160c and continue baking for 10 minutes until the meringue is firm.
10. Remove from the oven and cool for a few minutes and then turn out onto a large sheet of baking parchment that is liberally dusted with icing sugar.  You are turning it upside down when you do this, so the top of the meringue is now in the icing sugar. 
11. Allow to cool and then when ready peel the baking parchment away from the meringue. With the shortest side facing you lightly score in from the end about 2cm, this will enable you to start the rolling up a little easier.
12. Spread with a layer of lemon curd. Top with a layer of the whisked double cream, reserving enough to decorate the top.
13. Scatter with the fruit reserving a few berries for decoration.
14. Then with the meringue so the shortest side is in front of you and you can get hold of the baking parchment,take it in both hands, gradually pull the baking parchment and meringue away from you turning and rolling the meringue over as you go until you get to the end and then roll the meringue over onto a serving plate.
15. Decorate the roulade with the remaining cream either by piping or spreading and scatter with the fruit. Chill until required.


Monday, 7 May 2018

Citrus  and poppy seed cake 


This cake mix can also be used to make muffins

Ingredients

175g butter/margarine
175g caster sugar
175g gluten free self raising flour
3 eggs, beaten
grated zest of 2 lemons
grated zest of 1 orange
juice of 1/2 lemon
juice of 1/2 orange
30g poppy seeds

Syrup

Juice of 1 lemon
Juice of 1 orange
juice of 1 grapefruit (or use another lemon or orange)
zest of 1 lemon
zest of one orange
45g icing sugar
100g granulated sugar

Drizzle topping to decorate (Optional)

100g icing sugar, sieved
3tbsp lemon, grapefruit and orange juice 

Method

1. Preheat the oven to 180c
2. Grease and line a 20cm loose bottomed cake tin with baking parchment 
3. Sieve the flour into a bowl and set aside.
4. In either a free standing mixer, with a hand held whisk or a wooden spoon, start by creaming the butter/margarine together with the sugar. Beat until its pale and creamy.
5. Slowly add the beaten egg, adding a spoonful of flour after each addition.
6. Once the egg has all been added slowly beat in the rest of the flour.
7. Add the grated zest, juice and poppy seeds and beat again.
8. Spoon the mixture into the tin and level.
9. Bake in the preheated oven for about 40 minutes. Check its baked all the way through with a skewer inserted into the centre, if it comes our clean it is cooked, if it isn't then bake for a little longer.
10. As soon as the cake is baked then make up the syrup by mixing all the syrup ingredients together in a bowl. Leave the cake in the tin.
11. Stab the cake all over with a skewer and spoon the syrup all over the top of the cake. Once it is covered, allow the cake to cool in the tin.
12. Once the cake is cool you can remove from the tin and serve or make up the optional drizzle by mixing the icing sugar,  drizzle all over, leave to set, serve.


Tuesday, 27 March 2018

Cupcakes


In a lot of cases with gluten free it is just about switching over to a good gluten free flour, sometimes you have to play around with the recipe but with cupcakes you can definitely just switch in a gluten free self raising flour. This is the recipe I use. I favour using Bertolli olive oil spread over butter, I prefer the texture and flavour of the finished cakes.  It should make about 12 cupcakes. See below for variations-


Ingredients

150g butter, softened
150g self raising flour, sieved
150g caster sugar
3 medium eggs, beaten
1/2 tsp vanilla essence


Method

1. Preheat your oven to 170c/gas mark 3
2. Line the cupcake tin with cupcake cases.
3. I use a mixer with a paddle blade for this stage but you can obviously do it by hand with a wooden spoon or use a hand electric mixer.
4. If using a soft margarine then you can actually just use the all in one method where you literally just blend and beat all the ingredients together until well mixed, light and fluffy. 
5. If using butter, Beat the butter and sugar first until light and fluffy, then add the eggs gradually beating well after each addition. I alternate with a spoonful of flour whilst adding the eggs to avoid curdling. Once the egg is all added then mix in the rest of the flour and vanilla essence.
6. Beat well and then spoon into the cake cases.
7. Bake for about 20 minutes. Check if cooked by inserting a sharp knife or skewer into the centre of a cupcake, if it comes out clean then they are cooked.
8. Transfer to a wire rack and allow to cool before icing.


Variations
Chocolate -Replace 25g flour with 25g cocoa powder
Lemon- Add in finely grated zest of 2 lemons or as with my lemon curd meringue cupcakes, fill each cupcake case and place a tsp full of lemon curd in the middle before topping them with more cake mix.
Bakewell- Add in 1/2 tsp almond essence to the mix, fill each cupcake case then add in a tsp full of raspberry jam in the middle before topping with more mix.
Fruit- Add in a handful of sultanas or raisins
Chocolate chip- Add in a handful of chocolate chips or chopped chocolate into the mix


Rhubarb and custard


Rhubarb and custard- Replace 25g self raising flour with 25g custard powder so it will be 125g self tasing flour and 25g custard powder and also add in 1 tsp vanilla essence. Then when you have spooned the mix into the cases top each cupcake with a spoonful of stewed or baked rhubarb, (see notes below for how to cook the rhubarb) Top with the custard buttercream.

Notes on rhubarb- Take 500g rhubarb, wash and place in an ovenproof dish/tray lined with baking parchment, take 50g sugar and sprinkle all over the top of the sugar, Cover with foil and bake at 200c for about 20 minutes, the give it a shake and continue to bake until tender keeping an eye on to so it every now and then, occasionally spoon any juices over any dry areas. This can take about 30-40  mins. Then you can chop up smaller while still keeping its shape for whatever you wish to use it for.
Rose rhubarb- For a delicious twist, add a few drops of rose essence into the rhubarb juice afterwards and lightly stir through.


Toppings

Buttercream

150g butter, softened
300g icing sugar
1 1/2 tbsp water
1 tsp vanilla extract or see below for alternative flavourings
Few drops of food colouring if desired

Variations

Coffee-  add 1 tbsp coffee granules mixed with 1 1/2 tbsp boiling water instead of the 1 1/2 tbsp water in buttercream recipe, allow to cool before adding to butter and icing sugar, OR 1 1/2 tbsp espresso coffee instead of 1 1/2 tbsp water in buttercream recipe.

Lemon-  Finely grated rind of a lemon and 1 1/2 tbsp lemon juice instead of the water in the buttercream recipe or add good dollop of lemon curd instead of water in buttercream.

Chocolate- 3 tbsp cocoa powder mixed in with the icing sugar, melt 80g dark chocolate, allow to cool and stir into the buttercream once the butter, cocoa and icing sugar is beaten. If too stiff slowly add up to 1 1/2  tbsp milk, you want the buttercream to be thick so you may not need all of it.

Custard- Add 2 tblsp of ready mixed custard into the buttercream plus a good grind of vanilla beans if you have a vanilla bean grinder or 1 tsp vanilla essence (You can use a scraping of seeds if preferred)

Method


1. Put the butter and icing sugar in a bowl and beat by hand, with an electric mixer or beat in a freestanding mixer. It is essential for the butter to be softened. If using a free standing mixer, I drape a tea towel over the top to stop the icing sugar dust flying everywhere. Add in the water and flavouring as you mix.
2.  Keep beating until really soft and then either spread or pipe onto cakes. 


Cream cheese topping

120g cream cheese
60 g softened butter
flavouring if desired 
480g icing sugar

Flavourings

Lemon- add grated rind of lemon, add a good dollop too of lemon curd
Coffee- 2 tsp coffee granules dissolved in 1 tbsp water 
Vanilla 1 tsp vanilla essence

Method

1. Beat the butter and cream cheese together until blended
2.Add the icing sugar gradually beating well after each addition.
3. Add flavouring, beat well. 


Monday, 26 March 2018

Gluten free Simnel Cake


This is the first time I have baked a gluten free Simnel cake and I have to say it is really rather good. Plus apart from the long slow cooking which is essential, it is pretty quick to whip up. I like an exceptionally moist fruit cake, if you don't then add 175g gluten free self raising flour plus 45g ground almonds instead of the 95g of each.

Ingredients

175g currants
175g sultanans
75g glace cherries halved
50g flaked almonds
50g mixed peel
50ml plus 4tbsp brandy
180g butter, softened
180g soft brown sugar
95g gluten free self raising flour (I use Freee foods) see note above
95g ground almonds 
1 tsp xanthum gum
1 tsp mixed spice
3 eggs, beaten
1 tbsp golden syrup
zest of 1 lemon and 1 orange
apricot jam or marmalade to top with
500g marzipan, I like to use white marzipan, its more of an off white 

Method

1. Preheat the oven to 130c, grease and line the bottom and sides of  a 20cm deep loose bottomed cake tin using baking parchment. Cut a circle also for the top.
2. Weigh and put the flour, ground almonds, xanthum gum, mixed spice and zest of the lemon and orange in a bowl together, set aside.
3. Place the currants, sultanas, cherries, mixed peel and brandy together in a saucepan, (if you are wondering why its 4 tbsp plus 50ml that is because the recipe called for 4 tbsp but once I put that in I felt it required more and have not measured out what the two together is!) Heat over a low heat until the fruit is softened and the liquid absorbed. This should only take about five minutes and you can get on with the rest of the mixing while this softens but keep an eye on it and stir it every now and then so it does not catch on the bottom of the pan and burn.
4. In a freestanding mixer, with a hand held electric mixer or with a wooden spoon, beat the softened butter  with the brown sugar until pale and creamy. 
5. Add the beaten egg gradually, adding a little four after each addition of egg. Once all the egg is incorporated beat well and then mix in the rest of the flour.
6. Add in the mixed fruit, if all the brandy has not been absorbed then don't  worry just spoon the fruit in and leave the liquid behind but I will be surprised if it hasn't all been absorbed. Mix really well. 
7. Spoon half of the mix into the prepared tin.
8. Next take a third of the marzipan and roll into a circle about 1 cm smaller than the tin, you do not want it to go right to the edge as it could burn as it bakes.
9 Place the disk of marzipan on top of the cake mix in the pan. Then top this disk of marzipan with the rest of the cake mix.
10. Cover with the circle of baking parchment , bake for about 2 1/2 hours, I do check it every 10 mins once it has been in 2 hours just as I hate overbaking a cake. Check by inserting a skewer in the middle of the cake, if it comes out clean it is done, just be aware it may be slightly sticky because of the marzipan but you just don't want any wet cake mix on the skewer.
11. Once it is cooked then place on a wire rack to cool. 
12. When ready to ice the warm up a good dollop of apricot jam or marmalade until runny and then brush the top with it. 
13. Roll out the remaining marzipan to a circle large enough to top the cake, keep back enough to make 11 equal sized balls. Top the cake and decorate with the balls.
14. This is not essential but then either with a chefs  blow torch or under a grill very lightly brown the top. Keep a very close eye if doing to under the grill as it will only take a few minutes and can burn very quickly.


Wednesday, 21 March 2018

Fudgy chocolate cookies


These cookies are a mix between a brownie and a cookie, they are a soft baked cookie which is just how we love them, the mix makes about 30 cookies but I make the mix and leave the dough in the fridge ready to slice off and bake whenever we want some. If you don't think you can eat this many cookies in a week then you can freeze half the dough, or just halve the ingredients.


Ingredients

150g plain chocolate (70% cocoa)
200g caster sugar
200g dark brown soft sugar
225g butter, softened
2 eggs, beaten
1 tblsp golden syrup
300g gluten free self raising flour (I use Freee foods)
1 tsp baking powder
125g cocoa powder
150g white chocolate, chopped


Method

1. Melt the plain chocolate in a bowl set over a pan of simmering water or in a microwave. Set aside while you move onto the next stage.
2. Sieve the dry ingredients together in a bowl and set aside. 
3. I use my mixer with a paddle blade attached for the next stage but you can do this by hand or use a hand mixer even.
4. Cream the butter until soft and then add in both of the sugars, beat until light and well mixed.
5. Next mix in the beaten eggs, syrup and melted chocolate all in one go. 
6. Beat the dry ingredients into the mix and the fold in the chopped chocolate. 
7. Tip the mix onto a sheet of greaseproof paper and shape into a sausage shape.
8.Wrap up the sausage of dough like a salami, either twist the ends or tie them and place in the fridge 
to chill for at least an hour. You can keep it in the fridge for several days.


9. When ready to bake, preheat the oven to 190c/gas mark 5, cut the dough into 1cm rounds and place on a baking sheet lined with baking parchment. Allow space for spreading. 
10. Bake them for 8 minutes and allow to cool on the baking sheet for 10 minutes then transfer to a wire rack to set. 


Wednesday, 21 February 2018

Chocolate cake 


I have quite a few chocolate cakes that I like to bake but this is one that has evolved over the years and I have now tried it gluten free. Trust me you can't taste the coffee in it but it does add a depth of  flavour. 


Ingredients 

For a two layer cake -

1 3/4 cups / 275g soft brown sugar 
1 3/4 cups / 245g gluten free self raising flour, I use Freee foods flour
3/4 cup / 70g  cocoa
1 tsp baking powder
1/2 tsp salt
2 eggs
1 cup / 200ml milk
1/2 cup / 100ml grapeseed oil
2 tsp coffee granules 
1 cup / 200ml boiling water
1 tsp vanilla essence 

For a three layer cake-
415g soft brown sugar
365g self raising flour 
105g cocoa
1 1/2 tsp baking powder 
3/4 tsp salt
3 eggs
300ml milk
150ml neutral oil (I use grapeseed oil)
3 tsp coffee granules
300ml boiling water 
1 tsp vanilla essence

I then use one of these chocolate frostings- the first one is less rich

Chocolate frosting -
1 cup / 227g  softened butter  
1/2 tsp salt
2 cups / 250g icing sugar
1 cup / 100g cocoa
1/2 cup /150ml sour cream
 1 cup / 170g chopped mix of milk and plain chocolate ( I use a half and half mix of galaxy and plain chocolate )
1 tbsp golden syrup

method-
1. Melt chocolate in a bowl in a microwave or in a heatproof bowl over a pan of simmering water 
2. In a mixer, beat the butter and icing sugar on a low speed until well combined
3. Turn the mixer to high speed and beat until light and fluffy 
4. Add in the cocoa and beat again, slowly at first and then on high speed 
5. Add in the sour cream and beat and then whisk in the melted chocolate, salt and golden syrup and beat once more, the use to fill, and top the cake on the sides and in between each layer, this should be enough for a three layer cake 

Ganache  or use your own favourite chocolate icing

180ml double cream
225g plain chocolate, chopped into small pieces 
25g butter


Method

1. Preheat the oven to 180c 
2. Grease and line either two 19cm round cake tins or there if using the three tin mix
3. I use a mixer with a paddle blade attached but you can use a food processor or of course do it by hand.
4.  Mix the soft brown sugar, flour, cocoa, baking powder and salt together really well. 
5. In a jug or bowl dissolve the coffee granules in the boiling water., add the vanilla essence too. 
6. In a seperate bowl beat the eggs with the milk and oil 
7. Either with your mixer running or while beating well add these to the dry ingredients.
8. Now add the boiling water with the coffee essence slowly into the mix. It will seem very runny but don't worry thats how it should look.
9. Pour into the two tins.
10. Bake for 25-30 mins or until a skewer inserted into the middle comes out clean.
11. Allow them to cool in the tins for about 20 mins before turning out onto a cooling rack.
12. Allow to cool before icing. The cake is so light that sometimes it can crack but don't worry it will fine once iced.
13. To make the ganache, heat the double cream until just boiling. Remove from heat and add in the chocolate. Beat really well until the chocolate melts and then beat in the butter.
14. Allow to cool before using to sandwich together and icing. If necessary put in the fridge until its slightly thicker but not too thick
15. When ready sandwich the sponges together and then ice the cakes top and sides. Decorate.


I also bake this cake in a rectangular tin as a one layer cake. I use a tin that is 28cm by 22cm.
Make the cake in the same way and adjust the baking time accordingly, it may take a little longer and test in the same way with a skewer in the middle, I check on it halfway through and turn my tin around and then I test to see if its baked after about 25 mins. I then either frost it with whipped cream and decorate with raspberries, strawberries or sprinkles or use the frosting below.

Raspberry marshmallow frosting

Ingredients

100-150g raspberries (sounds silly, but I do this by colour, once it reaches the desired shade of pink I stop so sometimes I add the full 150 sometimes I want a more subtle colour
2 large egg whites
1/2 cup plus 2 tablespoons  / 150g granulated sugar
1/4 teaspoon cream of tartar
1/4 cup / 60ml liquid glucose
1/8 teaspoon table salt
1 1/2 teaspoons lemon juice

Method 

1. In a blender or food processor, process the berries until smooth and then pass through a sieve to remove the seeds, pressing through with a spoon to make sure you get all  the juice. Set aside.
2. In a scrupulously clean bowl put the egg whites, sugar, glucose syrup,  cream of tartar and salt.
3. Place the bowl over a saucepan of simmering water. Whisk with an electric hand whisk until the mixture is warm.
4. Take the bowl off the heat and whisk in the puree.
5. Either continue using the hand whisk or transfer to a free standing mixer with the ballon whisk attachment and mix on high speed for about  7 minutes when the mixture will be really thick. 
6. Add the lemon juice and whisk in.
7. Use to frost the cake once it is cooled. 
8. It is best served fresh, 


Tuesday, 23 January 2018

Blueberry and lemon bread and butter pudding breakfast

This recipe came about because my family love eggy bread/ french toast. One day I was making a bread and butter pudding for a dessert and realised that I could in fact leave out the sugar and make it as a breakfast as it contains all the same ingredients as the french toast just slightly more milk. We always serve our french toast with berries so it seemed the perfect marriage to pop them in while it baked and a sprinkling of lemon just to lift it a bit. Its a perfect way to use up bread that is a few days old. In fact to works best with bread that is not really fresh unless you are using gluten free bread in which case sometimes it can be a bit more delicate when it is a few ays old so just be extra careful when spreading the butter.
If I wanted to serve this as a dessert I would add in double cream too so I have added a variation at the bottom of the page for a dessert option.

This serves 4-5 people but obviously if you only want to serve two people then halve the quantities and likewise for more people adjust accordingly.  Or do as I do which is make up in little bowls to vary the fruit fillings. You can make it the night before ready to pop in the oven in the morning.


Ingredients

4 eggs
50g really softened butter or a favourite spread or margarine if prefer I just prefer using butter for this, you can of course skip this stage entirely and just melt a tiny bit of butter and brush it on the top. 
300ml milk, whatever your preferred milk is.
zest of one lemon
large handful of blueberries, about 150-200g 
Drizzle (about 1 tblsp) of  maple syrup or honey, or more to taste
About 8-10 slices of bread, that is 1-2 days old,  buttered, crusts removed and cut into triangles. I use Warburtons gluten free unsliced sourdough bread as I prefer that one. Use your judgement on how much bread to use, the bread I use does not have large slices so if you have a large sliced loaf you may need less bread.

Method


1. Preheat the oven to 180c/ gas mark 4
2. Grease an ovenproof dish. Choose one that is about 25cm by 18cm and not too shallow, or use several smaller dishes.
3. Butter your bread both sides and then remove the crusts, (I like to do this carefully so I get no butter on the crusts so I can then use them to make breadcrumbs but you can feed them to the birds or leave them on even!) Warning this can be messy so do make sure you use really well softened butter to avoid tearing the bread too much although don't worry if you do it will overlap anyway and bake just fine.
4. Whisk the eggs really well with the milk and syrup/honey or sugar.
5. Pour the mix through a sieve to make a smoother custard mix into another bowl/jug.
6. Arrange half the bread triangles into the bottom of the dish, overlapping as you go. 
7. Scatter half of the blueberries and lemon zest over the bread.
8. Pour over half of the eggy milk mix over the bread.
9. Layer more bread triangles on top and then pour over the rest of the egg, milk mix, scatter with the rest of the blueberries and lemon zest. At this point you really want to see it looking really soggy, don't worry that eggy milk mix will get absorbed by the bread as it soaks and then cooks.
10. Cover and allow to rest in the fridge for at least half an hour to allow to soak up the mixture. I allow it to soak overnight.
11. Bake for 30-45 mins until baked and golden and no uncooked egg mix around the edges.
12. Serve


Variations


I also use leftover croissants, pain au chocolate, and is amazing with panattone

Dessert

To serve as a dessert I would also add in 100 ml double cream,  add extra maple syrup or honey. OR 90g sugar and a sprinkling of demerara sugar on top just before baking adds a lovely crunch. 
1. Follow the same method as above just add your cream to the milk mixture and beat well. 

Blueberry and cinnamon - layer with blueberries and a dusting of cinnamon
Sultana - Add a sprinkling of sultanas to the layers
Chocolate- add plain chocolate chips
Chocolate and orange_ add chocolate and grated orange zest, candied orange
Pannetonne_ Same principle but use pane tonne instead of bread
Croissant - Use croissants or pain au chocolate

Saturday, 16 December 2017


Damson chocolates


Ingredients
Damsons that have been soaked in gin or vodka for a few months making either damson gin or vodka.
If you don't have any then you can use cherries, remove the stone and stalk (I have a cherry stoner, great gadget from either Lakeland or John Lewis) and soak these in chosen alcohol overnight or better still for a few days, either brandy, gin or vodka.
A packet of Marzipan
200g Plain chocolate


Method
1. Very carefully remove the stone from the damson. As they have been soaked they will be very soft so a warning this is a very messy business. To do this just cut into them and squeeze or flick the stone out or use a stoner.
2. See images below for the next stages.......If using the marzipan then take a large pinch of marzipan off the block about the size of a large grape. Roll out as shown, cut out with a cutter large enough to give you a circle to wrap around, then wrap around the damson pinching it closed enough to roughly seal around the damson. continue, placing them on a sheet of baking parchment as you go ready for the next stage.


3. Melt the plain chocolate in a bowl over a pan of boiling water.
4. Using two forks take each one of the marzipan covered damsons balanced on the fork and roll in the melted chocolate. Lift out and tap the fork lightly to get any excess chocolate off and set aside on the baking parchment. If you have not covered them in marzipan then dip the damsons in the chocolate in the same way and again set aside on the baking parchment.
5. Allow to set and then pop in a jar or cellophane bag.


Wednesday, 13 December 2017

Mulled wine


Ingredients

2 oranges
1 lemon
200g caster sugar
6 whole cloves
1 stick cinnamon
10 gratings of fresh nutmeg
1 star anise
2 bottles red wine

Method

1. I start by making a syrup base to avoid burning off all the alcohol in the making process. To do that add the sugar into a large saucepan that will eventually hold two bottles of wine and add in enough wine to just cover the sugar at this stage.
2. Wash the fruit. Using a vegetable peeler peel the peel from the oranges and lemons. Slice up the oranges and add to the pan. 
3. Add in the cloves, cinnamon, gratings of nutmeg either in a muslin bag or loose.
4. Bring to a simmer until the sugar has dissolved and then bring to a boil and boil for about 5-8 minutes until you have a thick syrup.  
5. When you are ready to serve add the rest of the wine. pop in your star anise. heat over a low heat for 5 minutes and then serve. 

To give as a gift, pop the cloves, cinnamon, nutmeg gratings, star anise in a muslin bag, attach along with the instructions to a bottle of wine. 


Tuesday, 12 December 2017

Christmas spice biscuits


Ingredients

100g oats, ground into a flour (or use oat flour)
100g rice flour
1/2 tsp baking powder
1/2 tsp mixed spice
1/2 tsp cinnamon
1 tsp ginger
50g dark brown soft sugar ( I use muscovado)
50g  golden syrup or black treacle (I favour golden syrup)
100g butter 
1 tbslp milled flaxseed mixed with 3 tbslp water

Method

1. First preheat the oven to 170c/gas mark 4
2. Line a few baking sheets with with baking parchment.
3. Mix up the 1 tblsp milled flaxseed and 3 tblsp water and set aside. 
4. Using a high speed blender or food processor make your oat flour by grinding the oats into a flour.
5. I use a free standing mixer for making the dough for speed. Add into the bowl all the dry ingredients. Mix with your hands if doing by hand or mix with the paddle blade on your mixer until the ingredients are blended.
6. Add in the butter and and mix until it resembles fine breadcrumbs.
7. Make a well in the centre and add in the golden syrup or treacle depending on what you prefer. (or have) and your flaxseed mix.
8. Mix really well so it is all blended in. Bring the dough together and form into a flat rectangle and wrap up in baking parchment. Place in the fridge to chill until ready to use or use straight away.
10. To roll out I use baking parchment to roll on to and on top of and roll with the dough squidged between the sheets to avoid drying out the mix by adding any more flour,  if you find that tricky then  lightly dust the rolling pin and surface but I would definitely recommend at least using parchment to rollout onto.
11. Roll out the dough to about 5mm thick. Use your cutters to cut out and place evenly spaced on the lined baking trays. It is really important to place similar sized biscuits on each tray (so if you have a mix of large and small biscuits put all the small ones on one sheet and all the large ones on another because the small ones will obviously cook quicker so this will avoid any burning.
12. At this stage it can be a good idea to chill each tray for 20 minutes before baking to help the biscuits hold their shape but I don't always bother and they do hold their shape well still with maybe a little spreading.
13. Bake each tray separately for about 15 minutes but they are baked when they are golden brown. 
14. Allow to firm up slightly before removing them to a wire rack as they will be very fragile when hot. (or very carefully lift off with a spatula)
15. Allow to cool before decorating. I like to use royal icing to decorate but you can use whatever icing you favour. Enjoy. 


Tuesday, 28 November 2017

Chocolate orange sticks


These can only be described as a magical way of using up what something that would otherwise end up in the compost, the end result is simply amazing and quite possibly the only way I wish to eat chocolate orange from now on. They would make an amazing gift if packaged in a pretty jar or in cellophane for Christmas or any other time.


Ingredients
3 navel oranges, preferably organic or any other citrus you desire
3/4 cup water
1 1/2 cups caster sugar
100g plain chocolate or vegan chocolate

Method

1. Wash the oranges, cut off the top and bottom of each orange, score the peel from top to bottom to make the peel easier to remove.
2. Remove the peel and pith. Cut each quarter into slices about 6mm wide 
3. Place the peel in a large saucepan and cover with cold water.
4. Bring to the boil 
5. Drain the water away and cover with fresh water again and bring to the boil for the second time.
6. Repeat the process twice more ( so four times in total)  This seems long winded but it is really important, do it while you are doing something else in the kitchen and you really won't notice! 
7. Drain the peel and set aside.
8. Meanwhile in a bowl whisk together the water and the caster sugar.
9. Pour the sugar and water mix into a saucepan large enough to take the sugar syrup and peel once added.Bring to the boil.
10. This part is so important. DO NOT STIR! If you do the sugar will crystallise straight away.
11. Let the mixture simmer for about  9 minutes to melt the sugar. 
12. Add the peel, DO NOT STIR! Do not even put a spoon or implement in the syrup.  Just jiggle the pan around carefully so as not to splash yourself with hot syrup. You want to make sure all the peel is covered in the syrup so swirl the pan every now and then.
13. Cook for about an hour without stirring or until the peel is translucent.
14. Cover a baking sheet with baking parchment.
15. Using a slotted spoon remove the cooked peel and lay on the baking parchment, separating the pieces as you go so they don't get stuck together. While they are still sticky you can lightly dust them with more caster sugar if you like but you don't need to.
16. Allow to dry  and cool completely before dipping in chocolate.
17. Line another baking tray with baking parchment.
18. Melt the chocolate in a bowl set over a pan of barely simmering water.
19. Dip one end of each candied stick into the chocolate and lay on the baking parchment to set.
20. Once the chocolate is set store in a jar or an air tight container. They will keep for about three weeks like this although I have not tested this theory! Enjoy.


Monday, 27 November 2017

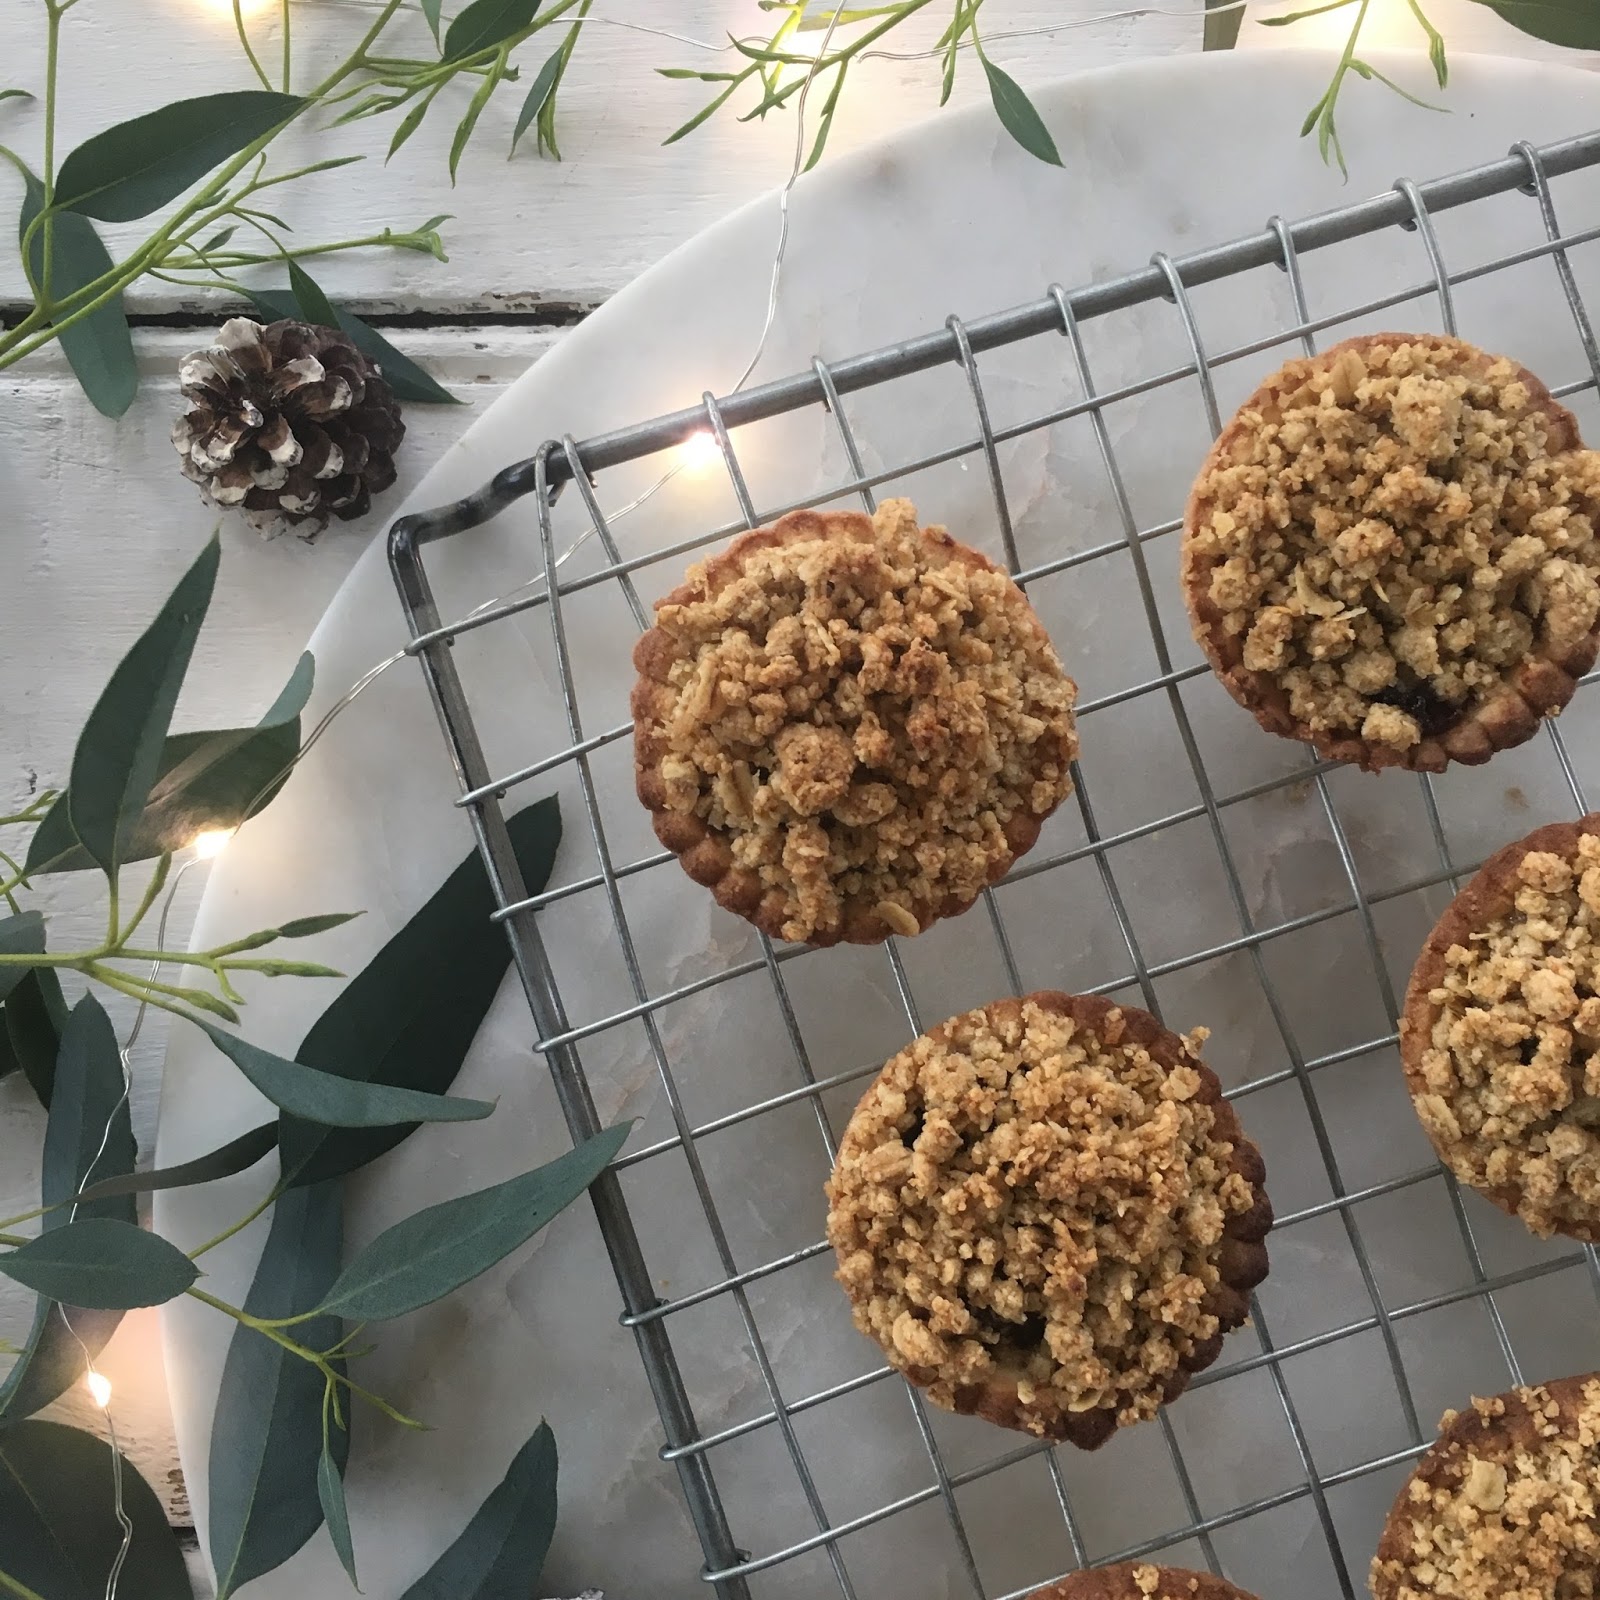
Mince pies


Ingredients

Pastry

115g rice flour
115g ground almonds.......... OR you can also use very fine polenta if you do not like nuts , you must make sure its very fine, I blend mine in my blender to make a polenta flour
115g butter, diced....... OR can use 1/2 butter and 1/2 trex  (so 57g butter, 57g trex)
50g icing sugar
juice of a small orange 
1 tsp xanthum gum
1 egg yolk (only if needed, I never do!)

Gluten free mincemeat (I make a recipe that is Mary Berrys as she uses butter instead of suet)

Crumble topping

180g gluten free oats
100g butter, melted
90g demerara sugar

Method

1. First of all make your pastry, I use a free standing mixer with the paddle blade attached but you can use a food processor or do it by hand.
2. Put the rice flour, ground almonds and xanthum gum into the mixer and add the butter, mix until it resembles fine breadcrumbs.
3. Add the icing sugar and blitz, then add half the orange juice and blitz again, adding more orange juice until it comes together, if it is still crumbly then add in some more orange juice or egg yolk (You won't need all of it) I never need the egg yolk but it all depends how big your orange is!
4. It may be slightly sticky but don't worry, dust a sheet of baking parchment with rice flour and plonk you dough onto it, shape it into a flat rectangle and wrap up and pop in the fridge to chill. 
5. While it chills make your crumble topping
6. Using a high speed blender or food processor, grind roughly 2/3 rds oats (about 110g) to a fine oat flour. 
7. Put into a bowl or mixer. I do it all in the mixer with the paddle blade attached. Mix in the remaining oats, sugar and mix in the melted butter until well distributed and is all crumbly.
8. I often make this in advance and leave in the fridge in a freezer bag until needed as will keep quite happily for a week or and use as required.
9. Once this is done remove the pastry from chilling (If it has been left for a few hours it may need to come to room temperature slightly before its soft enough)
10. Grease your mince pie tray with butter or margarine and then also dust with rice flour tapping off the excess.
11. This is the part that can be tricky, gluten free pastry will always be harder to work with as it is gluten that gives it the elasticity, but don't be scared of it.  I use a sheet of baking parchment to roll out on and dust that and your rolling pin liberally with rice flour.
12. I use a cutter that is 8cm across, I cut them and lift each one out with a fish knife or cake slice as the pastry can break when moving it. Be patient with it and be prepared to roll a few at a time, gluten free pastry is very delicate. Place each disc of pastry in each mince pie hole without pressing too much into them,  as you work your way through all of them you should find that the pastry will have relaxed enough into the tin to line each case without you pressing into it. If not lightly press enough to take the mincemeat. You really don't want to squidge the pastry in, it will make them easier to remove.


13. Fill each pastry case with a spoonful of mincemeat without overfilling and then top each one with a spoonful of crumble.
14. Bake in a preheated oven for about 15 minutes, turning the tray around half way through if your oven doesn't cook things evenly. 
15. Remove from the oven and allow to cool in the tin for a bit before removing as the pastry hardens on cooling. Very carefully loosen each one all the way round with a knife. Enjoy warm or cold. 


Tuesday, 17 October 2017

Pumpkin Cake


This is the quickest cake ever to make and has been a favourite recipe for a number of years now. My children love it. The recipe was originally given to me by an American lady although it has been adapted slightly over the years, she would often serve it for breakfast. Of course when I have one made in the house it seems only right to do the same. I have had to tweak it slightly to make it gluten free but if you are not gluten free just switch out gluten free self raising flour and switch back in 2 cups regular self raising flour. As with many vegetable based gluten free cakes it doesn't keep for longer than a few days. Usually any cake is gone within a few days in our house anyway. It is always going to be best served fresh. I usually top this with a glaze made with icing sugar and water but you could also top it with a cream cheese frosting or the caramel sauce I have included the recipe for. Either way it is delicious. I do sometimes also make the same mixture and pop it into muffin cases to make pumpkin muffins. 

The measurements are in cups which I prefer too as it makes it so much quicker. 

Ingredients

4 Eggs
1 cup/235g caster sugar
1/4 cup/50g soft brown sugar, I  use dark brown muscovado
1 cup/250ml grapeseed oil or mild and light olive oil
2 cups/350g  gluten free self raising flour (I use Doves farm)
3 tsp ground cinnamon
1 1/2 tsp mixed spice
1/2 tsp ground ginger
pinch of salt
2 cups/200g grated pumpkin or butternut squash, if using cup measurements really compress it into the cup so you get two full cup fulls
 or 2 cups/ 470g if using pumpkin puree, I use tinned  pumpkin puree out of season but I prefer to use grated pumpkin, also if I have a pumpkin or butternut squash that I am not going to use up in the next few days I blend the peeled flesh in a blender until a puree and freeze it in portion sizes in container with a lid or a freezer bag of 2 cupfuls/470g ready to defrost and bake with.

Option

50g chopped pecans

Glaze

1 1/2 cups icing sugar, sifted
3 - 4 tblsp water

Method

1.Preheat the oven to 180c
2. I use a non stick bundt cake ring for this cake, 27cm across. You can also make into two smaller loaf tins  or muffin cases, (just adapt the cooking time accordingly) I grease it and dust with flour lightly tapping any excess off to make sure the cake doesn't stick.
3. Either in a free standing mixer with a paddle attachment or with a handheld mixer, beat the eggs, sugar and oil until light and fluffy.
4. Mix all the dry ingredients together and beat into the egg, oil and sugar mixture.
5. Add the pumpkin puree and beat well.
6. Pour into the prepared tin and level the top.
7. Bake for 55 minutes. When cool enough to handle turn out onto a wire rack and drizzle with a glaze made with the icing sugar and water, or give it just a dusting of icing sugar, a cream cheese frosting (use the one on my carrot cake recipe)  or the caramel sauce below.


Salted caramel sauce

Ingredients

1/3 cup caster sugar
1/3 cup muscovado sugar
3 tblsp unsalted butter
1/2 cup double cream
pinch sea salt (optional, to make salted caramel)

Method

1. Put the caster sugar and 2 tblsp water in a small saucepan and dissolve over a  low heat. DO NOT STIR! Do not even put a spoon into the mixture as that could make it crystalise.
2. Once the sugar has dissolved, turn the heat up and bring to the boil and allow to boil until the liquid turns to an amber colour. STILL DO NOT STIR! Just give the pan a shake every now and then.
3. I have all the other ingredients ready to add straight in.
4. Remove from the heat and add the muscovado sugar, butter and cream all at once and then quickly beat it. Now you can stir it.
5. Return to a low heat and simmer for about 4 mins or until it is thick enough to coat the back of a wooden spoon. 
6. Remove from the heat and add the pinch of salt if desired. 
7. Leave it to cool a bit before drizzling over the cake. Top with chopped pecans.
8. Will also keep covered int the fridge for a few days. I also serve it with ice cream or top pastries with it.


Friday, 22 September 2017

Gluten free plum and almond cake


This is another variation of my almond cake and you can also use apples, pears, damsons or whatever fruit you fancy.


Ingredients

150g butter, softened
125g caster sugar
2 eggs
1 tsp almond essence
75g gluten free self raising flour (I use Doves Farm or I think it may be called Freee foods now)
75g ground almonds

Topping

8 plums, halved 
25g butter 
1 heaped tablespoon soft brown sugar
or 
3 medium apples, peeled, cores removed and cut into slices 
25g butter
1 heaped tablespoon soft brown sugar
or 
3 medium pears, peeled, cores removed and cut into wedges lengthways
25g butter
1 heaped tablespoon soft brown sugar


Method

1. Preheat the oven to 170c/gas mark 3 
2. Grease a 20cm loose bottomed cake tin and line the bottom with baking parchment.
3.Melt the butter over a medium heat until melted and then add in the sugar stirring until the sugar has melted and is bubbling.
4. Add in the plum halves (or apples or pears) and cook turning them occasionally until they are soft but still holding their shape, the butter, sugar mix should be nice and caramelised also by then. Set aside until needed.
5. Put butter and sugar into a bowl and beat with an electric whisk or with a freestanding mixer with the paddle blade, until pale and fluffy.
5. Break in one egg and whisk well adding a spoonful of flour if it starts to curdle.
7. Crack in the second egg and a spoonful of flour and whisk again.
8. Add the ground almonds, almond extract and whisk until blended, then add in the flour and give it a final mix.
9. The mix is quite stiff but spoon into the tin and spread out.
10. Top the frangipani mix with the cooked plums (or apples or pears) and buttery syrup.
11. Bake in the oven for 45-50 mins or until a skewer inserted into the middle comes out clean.
12. Remove from the oven and cool on a wire rack.
13. Carefully push out of the tin and slide off the base onto a serving plate.
14. Dust with icing sugar or drizzle with icing if desired.
15. Works really well as a pudding warm or served as a cake.